


Dig Dug
Finished and For Sale
05 Feb 2014
I forget to take final state pictures once I move on to a new project. Dig Dug is done. The final product pictures are in the Photo Log.
Photos: Final State
Photos: Final State
Bottom Right
19 Oct 2013
Not always pretty, but truly necessary. After all the work on the left side, the right side needed attention after the molding was done. The swelling and flaking hit this side as well. There is an edge where I tried to take the swelling down but could not risk losing more of the vinyl side. It is a compromise between the width it should be and the width it was swelled out. Fortunately it is an are that will be out of sight and blocked by the next game or the carpet pile.
Photos: Right Edge
Painted Over
22 Sep 2013
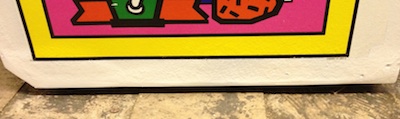
Bottom of left is better after Bondo. There was water damage and it just kept flaking off. I “dug” down to the stable section and filled with Bondo. After the molding channel is cut and the molding is on this will be a solid unit again.
Dover White matched well except on the gloss. It is a little too new looking. I am confident the bottom of the cabinet will get the proper abuse to dim it down like the rest of the cabinet.
Photos: Bondo Work
Bondo Bottom
28 Aug 2013

The bottom edge of this game was fraying and crumbling. We remedied that with some Bondo and patience. Bondo is great for making crumbling particle board solid again but it is a slow process. Every time I try to rush it, I get bad results. Therefore slow and steady is my course.
Painted Pink
19 Jun 2013
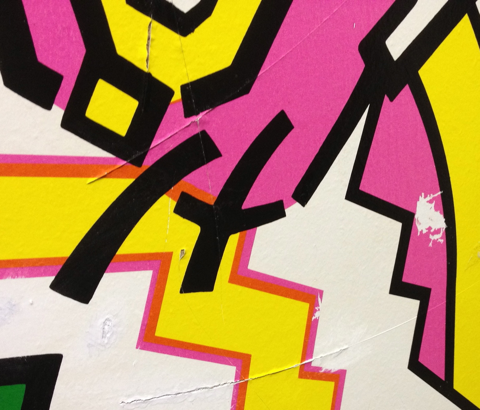
The gouges and cuts also invaded the pink areas. I masked them off and repainted. They will be much nicer after they dry.
Photos: Pink
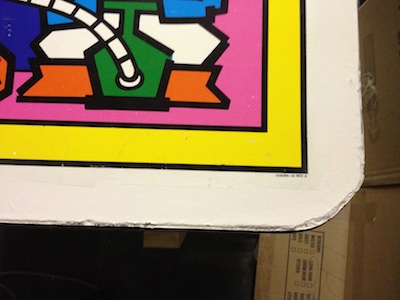
Side Repair
15 Jun 2013
The cabinet needed some repair on the Left side of the Control Panel. Some swelling and flaking had made the T-Channel unable to hold the molding. We sanded, filled and recreated the channel. I inserted new molding as a guide and filled more. Next we paint and insert the final molding.
Photos: Dig Dug
Photos: Dig Dug
Painted Yellow
28 May 2013
We masked off the yellow section with the deep gouge in it. I had wood filled earlier so now it was ready for paint. Found a Rustoleum Quick Shot in a yellow that matches pretty close. Sprayed a few coats waiting for it to dry.
Third board
24 May 2013
The swapped chip did not fix the last board because it would not boot today. We acquired a Dig Dug board at the CNY Swap Meet and put it in. It ran for hours! We will keep testing but my hopes are high for the first time on this project.
Handle board is strong, the flex is gone.
Cleaned the Right side and sanded where I could. Filled that deep gouge with wood fill, let it dry!
Handle board is strong, the flex is gone.
Cleaned the Right side and sanded where I could. Filled that deep gouge with wood fill, let it dry!
Top Back
20 May 2013
Needed to repair the Top Back Panel. The panel is used as a handle and works with the wheels to allow easy cabinet moving. The glue that attaches the panel to the internal rails had dried up and was causing the panel to flex when used as a handle.
We removed the panel carefully and sprayed the exposed wood back to black. While it dried we cleaned the Left Side and top. The vent is in good condition just needed a deep clean.
We applied glue to the rails and all the edges of the panel. That should do it! Replaced the security screws and waited for it to dry.
Swap Chips
11 Apr 2013
David was packing the board to be shipped back and noticed some missing legs on the Namco chips. We swapped them out with some on a dead board and Dig Dug fired up!
Working Board?
04 Apr 2013
The board arrived and I plugged it in, it does not boot! Played with voltage and re-seating chips, nothing.
Acquisition
20 Mar 2013
I traded a Centipede Cocktail I had sitting around for a long time. This was slated to become a 60 in 1 unit. It was in decent shape and I could not let that happen. I found a working board for it and ordered it.